How to install an SSL certificate on hosting?
What is SSL?
Secure Socket Layer (SSL) is designed to provide secure transmission of confidential information (e.g. login, password, credit card number, etc.) between a website’s server and a user’s browser. Usually, this data is sent in a simple text format, and anyone able to hijack the data stream will use this opportunity to steal or fake this data. But with SSL this data is encrypted, and even if intercepted, it will not be able to be decoded. Moreover, only a website secured with SSL can get to the top of the search results.
What is an SSL certificate for?
A web server requires an SSL certificate to establish an SSL connection. Nowadays an SSL certificate can be provided for free or can be purchased from a Certification Authority (CA). It is better to obtain a certificate from a CA for a website that uses any payment system and suggests buying or selling something, as the users consider such types of websites more trusted and secure. A free SSL certificate will fit any blog or informational site.
For websites that rule big business, it is highly recommended to set The Extended Validation SSL Certificate (EV), which provides the highest level of validation. Website customers will see the Green Bar of Trust™ that proudly displays your company name and will know that your website is safe and reliable.

How to install an SSL certificate?
If you have your own SSL certificate or want to install a free one, you can do it from your control panel.
DirectAdmin
- Go to your client area to the “Services – My Services” section and click the “Open Direct Admin” button;
- The Direct Admin panel will be opened. Go to the “Account Manager” section and click the “SSL certificates” button;
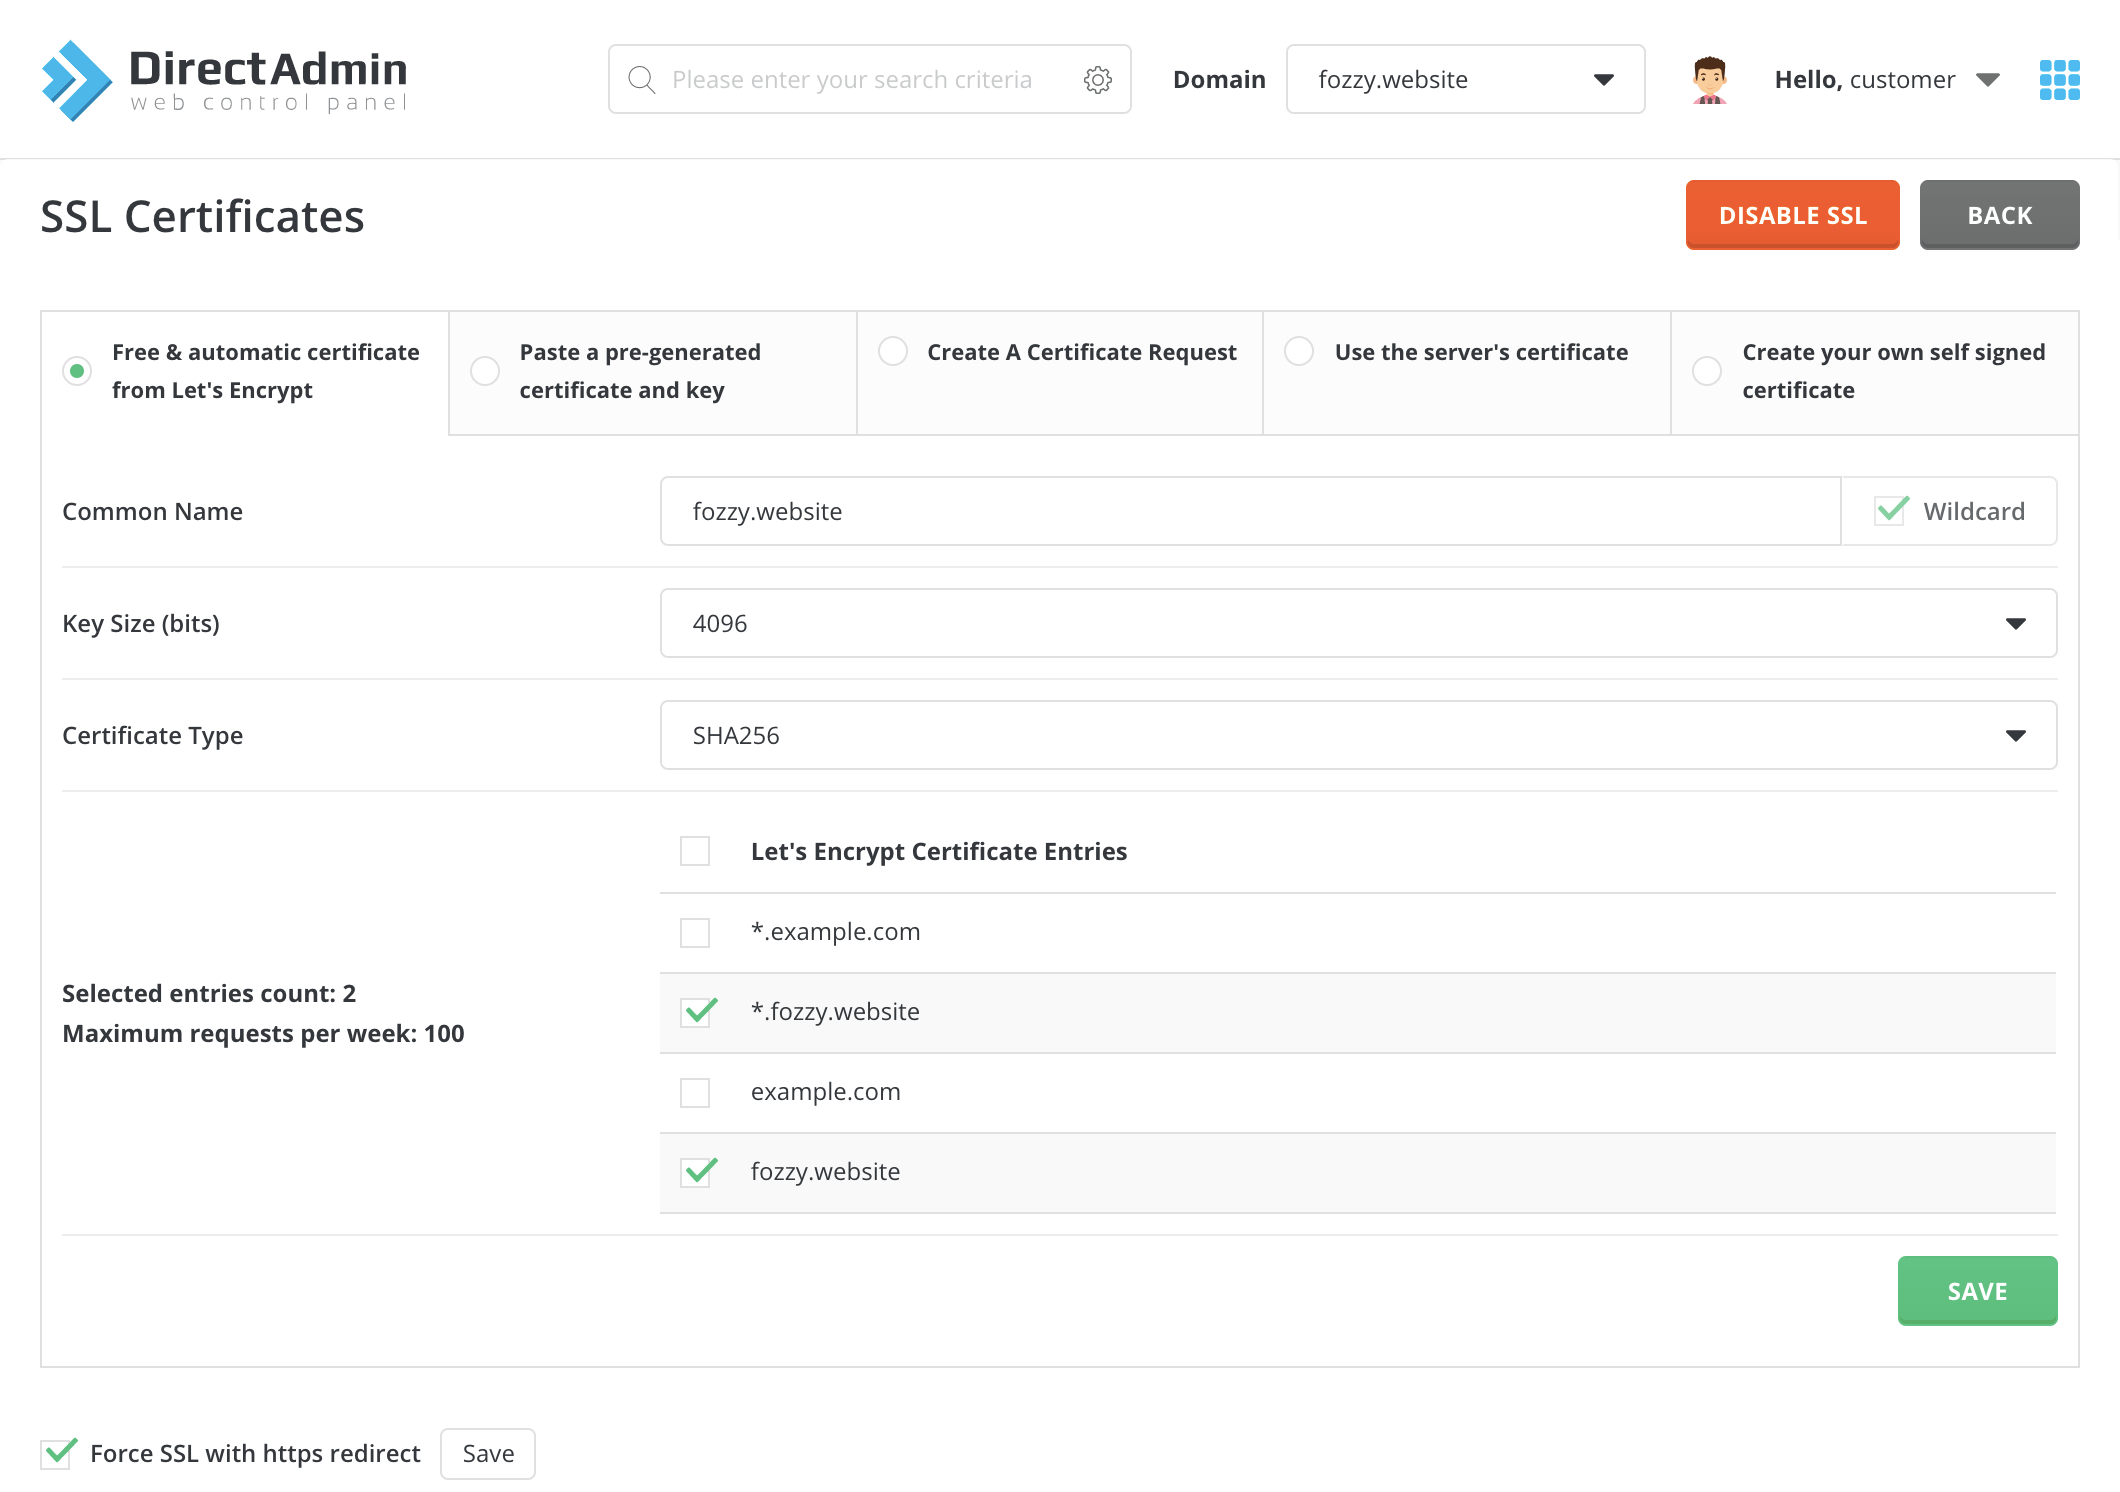
- Choose a domain you want to install an SSL certificate for in the top menu bar;
- Select the needed type of certificate:
- Free & automatic certificate from Let’s Encrypt – the authoritative Let’s Encrypt certificate will be installed on your domain. It is free and trusted by all modern browsers. Also, it will renew itself automatically every 3 months, so you don’t have to worry about it.
- Common Name – your certificate’s main domain name. It is enough to leave here your domain name;
- Wildcard – this certificate will be installed on your domain and all of its subdomains if this option is enabled;
- Key Size (bits) – the longer the key size, the strongest the protection;
- Certificate Type – the encryption algorithm. SHA1 is an old and insecure algorithm. It is not trusted by browsers since 2014. Pick SHA256;
- Selected entries – select your domain hosts and subdomains you want to install the certificate for;
- Free & automatic certificate from Let’s Encrypt – the authoritative Let’s Encrypt certificate will be installed on your domain. It is free and trusted by all modern browsers. Also, it will renew itself automatically every 3 months, so you don’t have to worry about it.
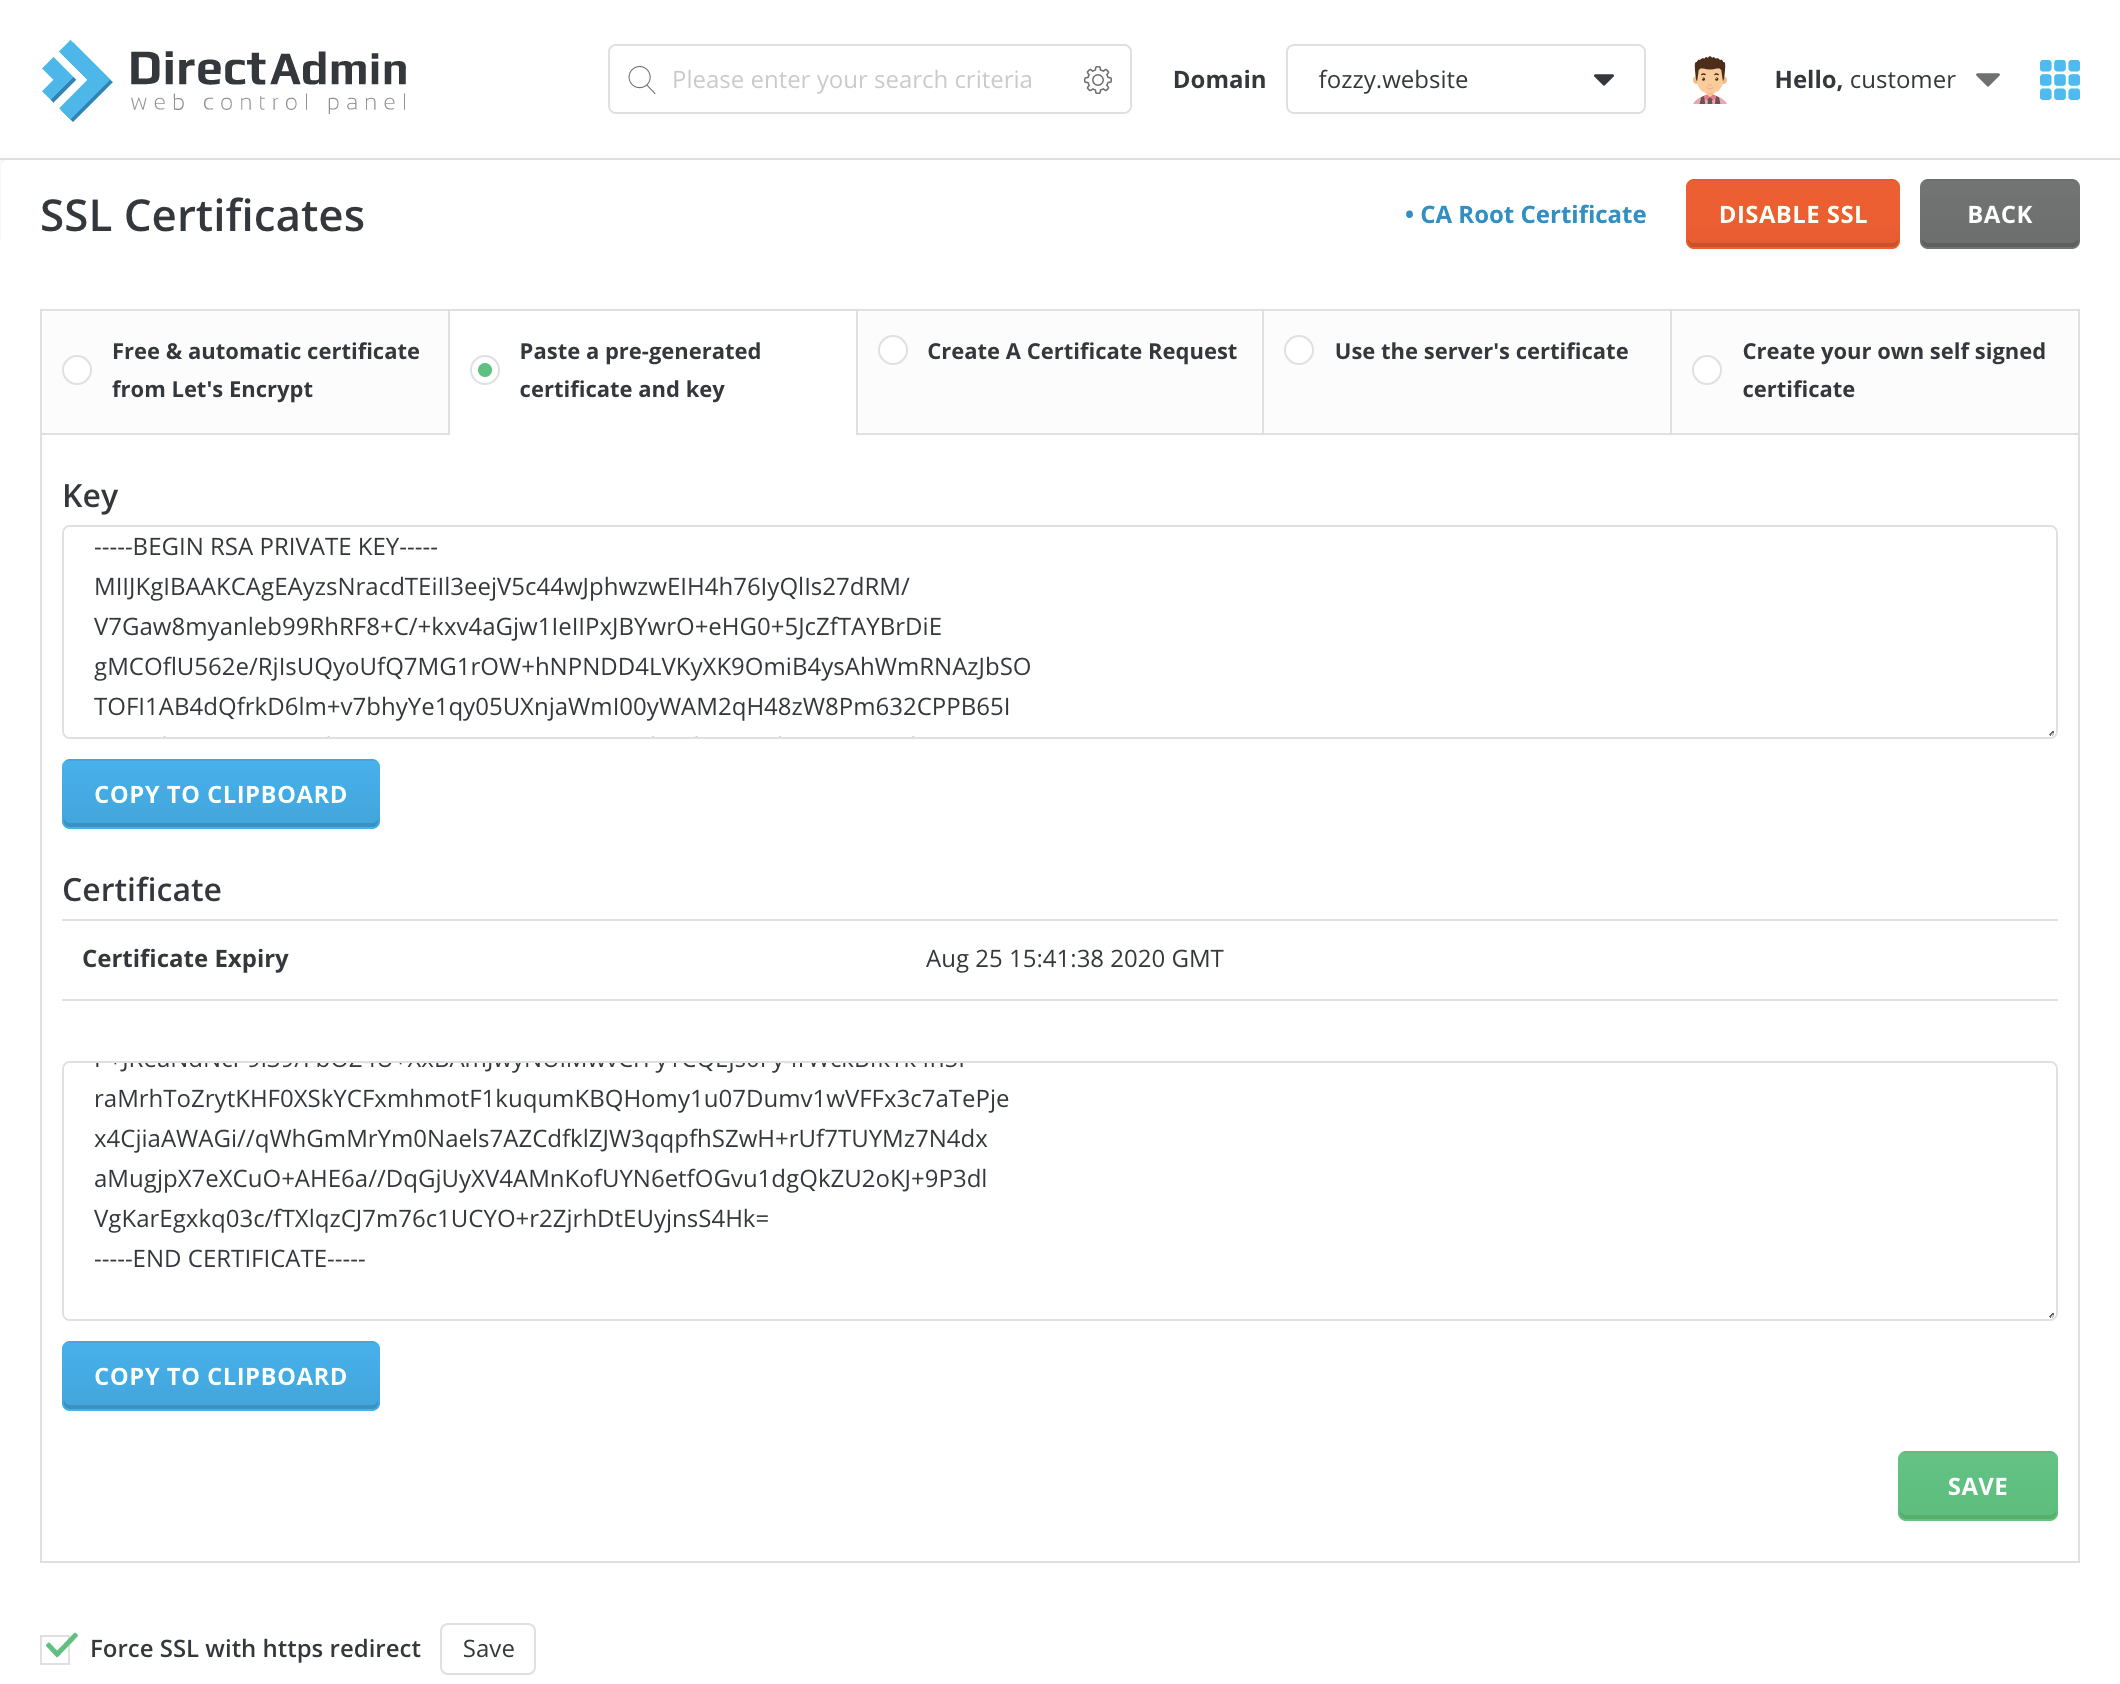
- Paste a pre-generated certificate and key – install your own purchased certificate provided to you by your Certification Authority;
- Key – your certificate private key. It is often provided by CA in .key file or made by you during the creation of Certificate Signing Request (CSR);
- Certificate – your domain certificate itself. It is provided by CA in .crt file (fozzywebsite.crt for example);
- CA Root – your CA root certificate or chain of intermediate certificates (your SSL certificate will be considered as trusted by browsers only if it is signed by these root certificates). It is usually provided by CA in .ca_bundle file (fozzywebsite.ca_bundle for example).Please note that the “CA Root Certificate” link will appear at the top of this menu near the “Back” button. Click this link if you have CA Root Certificate, paste its code to the text area, and be sure to hit the “Use a CA Cert” checkbox before saving the changes:
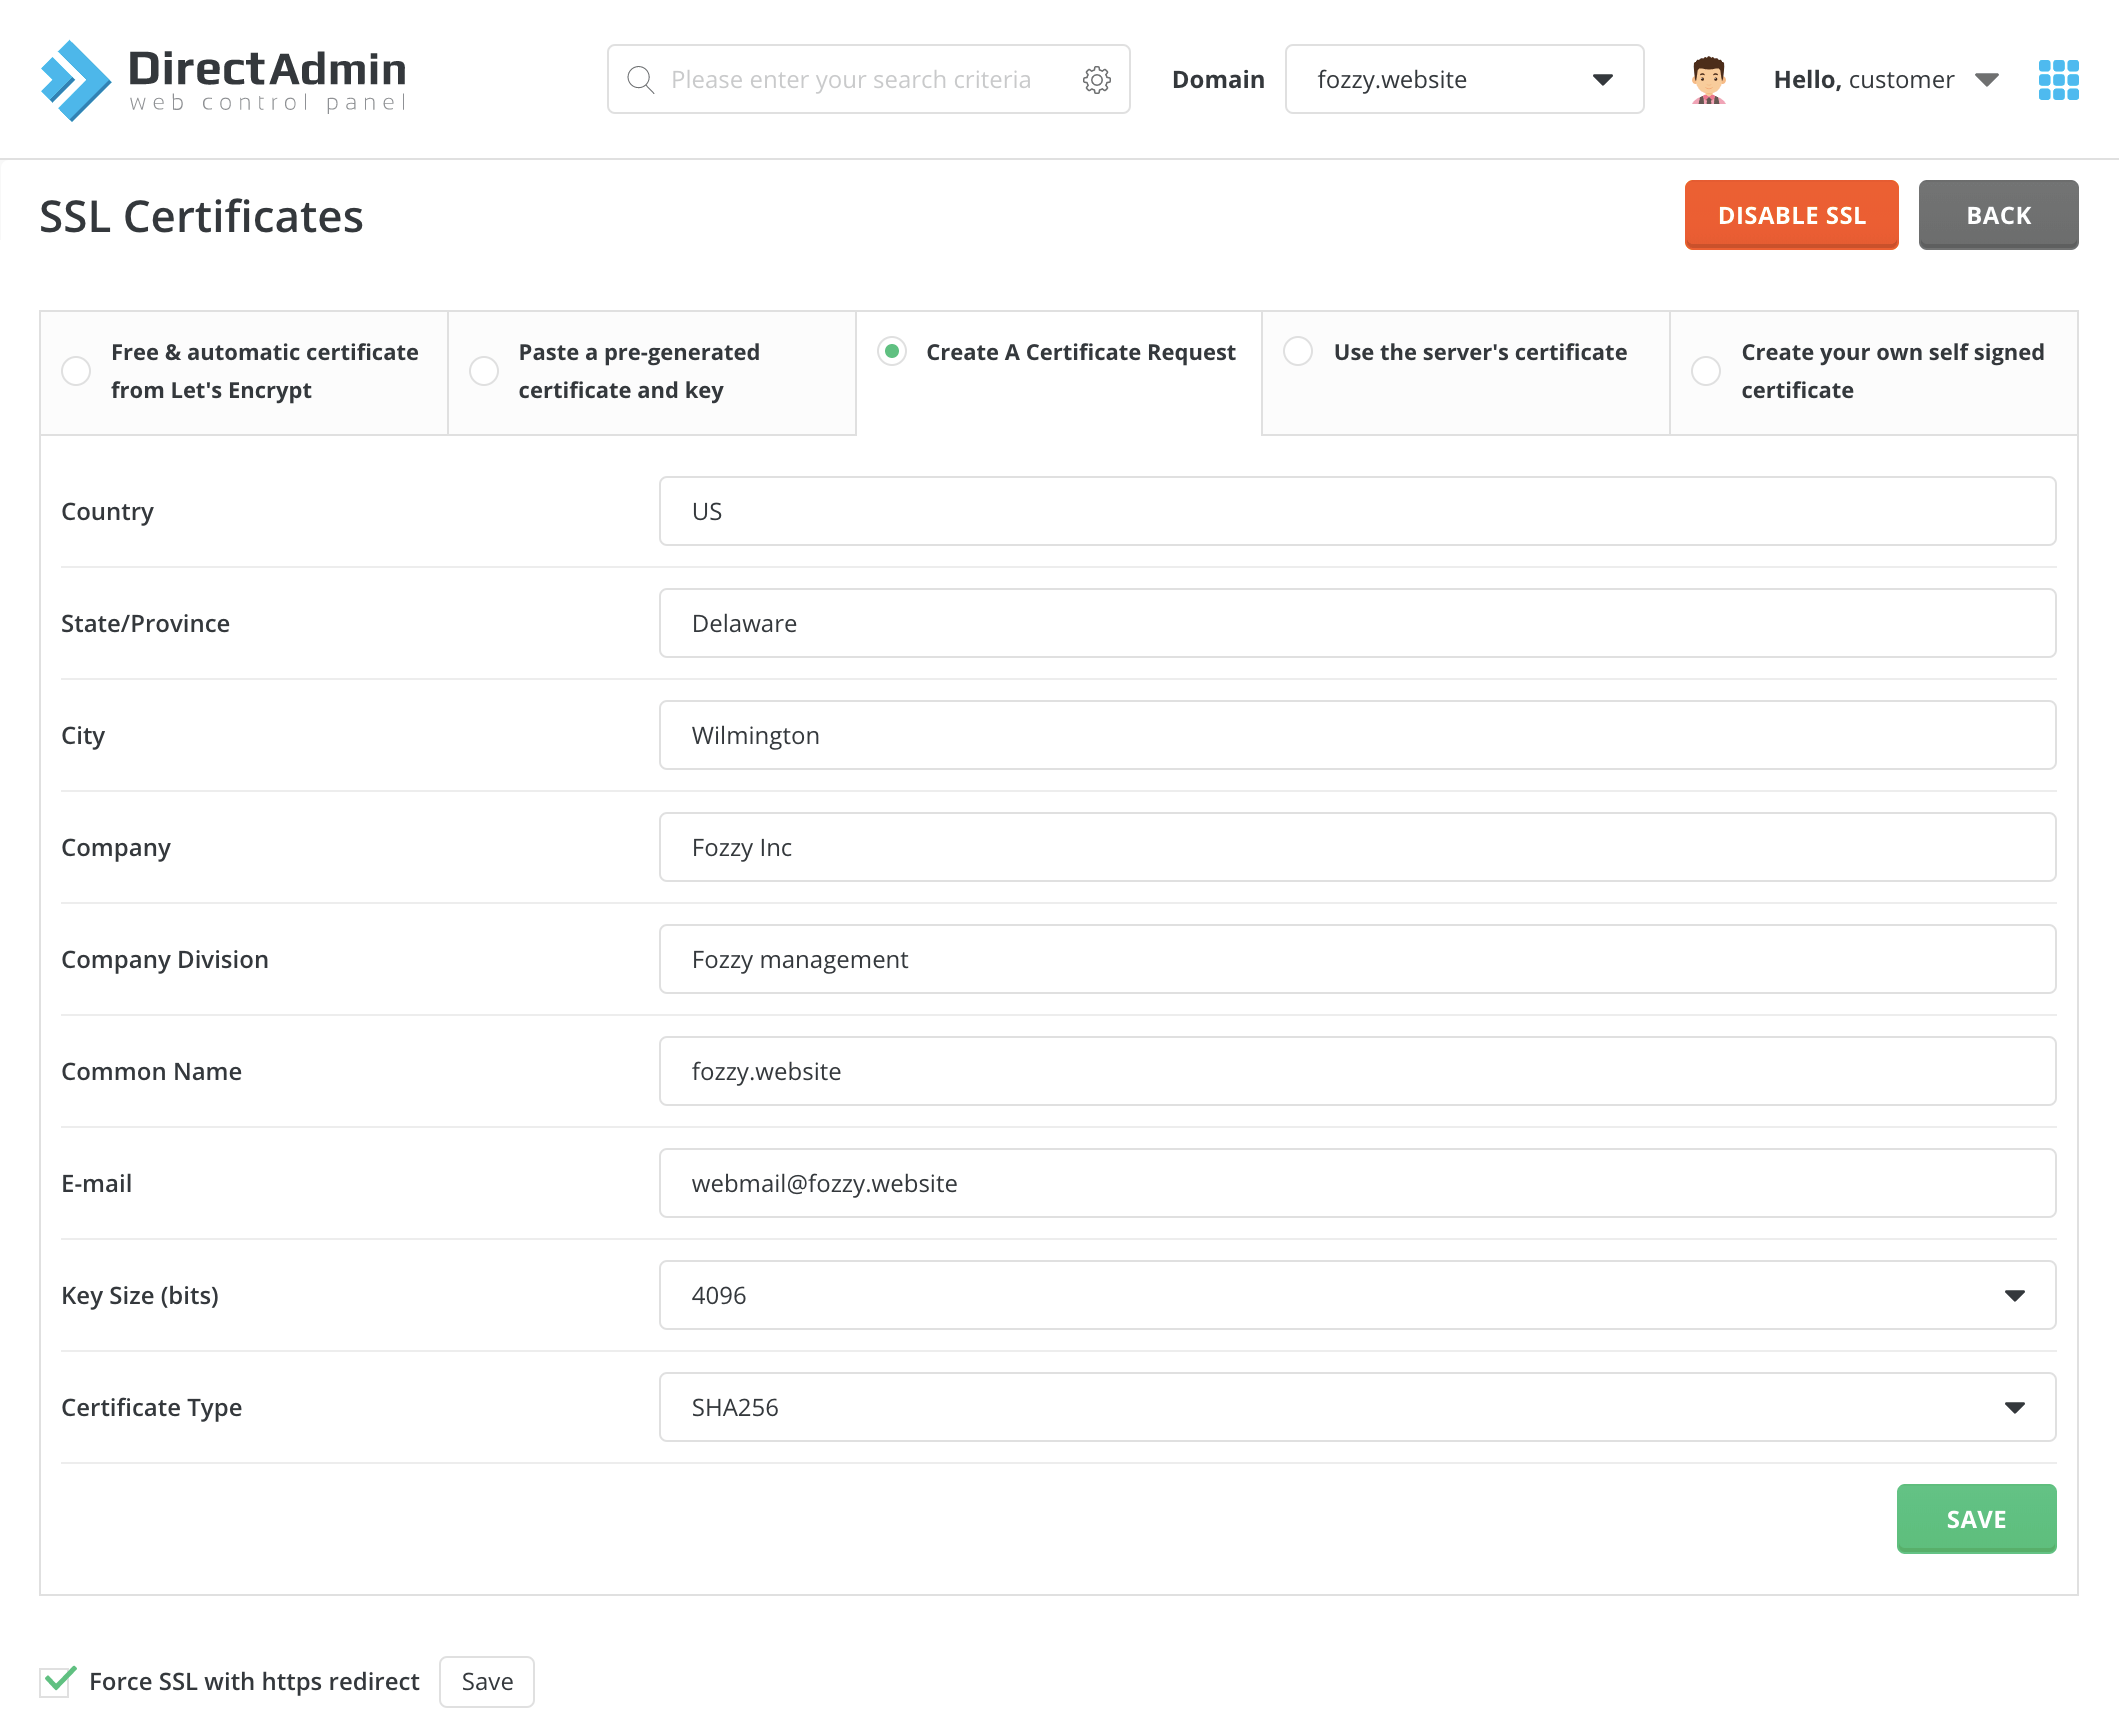
- Create A Certificate Request – CSR has to be created when you issue a new certificate. While creating a CSR in this section, you have to fill in the following lines with your personal data:
- Country – your country code (e.g. US);
- State/Province – the name of your state or province;
- City – your city name;
- Company – your company name (type “Private Person” if you don’t have any);
- Company Division – your company division (type “Private Person” if you don’t have any);
- Common Name – the name of your domain you want to issue a certificate for;
- E-mail – your email;
- Key Size (bits) – the longer the key size, the strongest the protection;
- Certificate Type – the encryption algorithm. SHA1 is an old and insecure algorithm. It is not trusted by browsers since 2014. Pick SHA256;
- Once all the information is specified, click the “Save” button. A new window displaying your CSR will be opened. Copy this text (including the “BEGIN/END CERTIFICATE REQUEST” sections) to a safe place. You will send this text to a CA and they will give you a Signed Certificate. Also, a new certificate Key will be generated along with CSR for this domain. This Key will be placed and stored in the “Paste a pre-generated certificate and key” section:
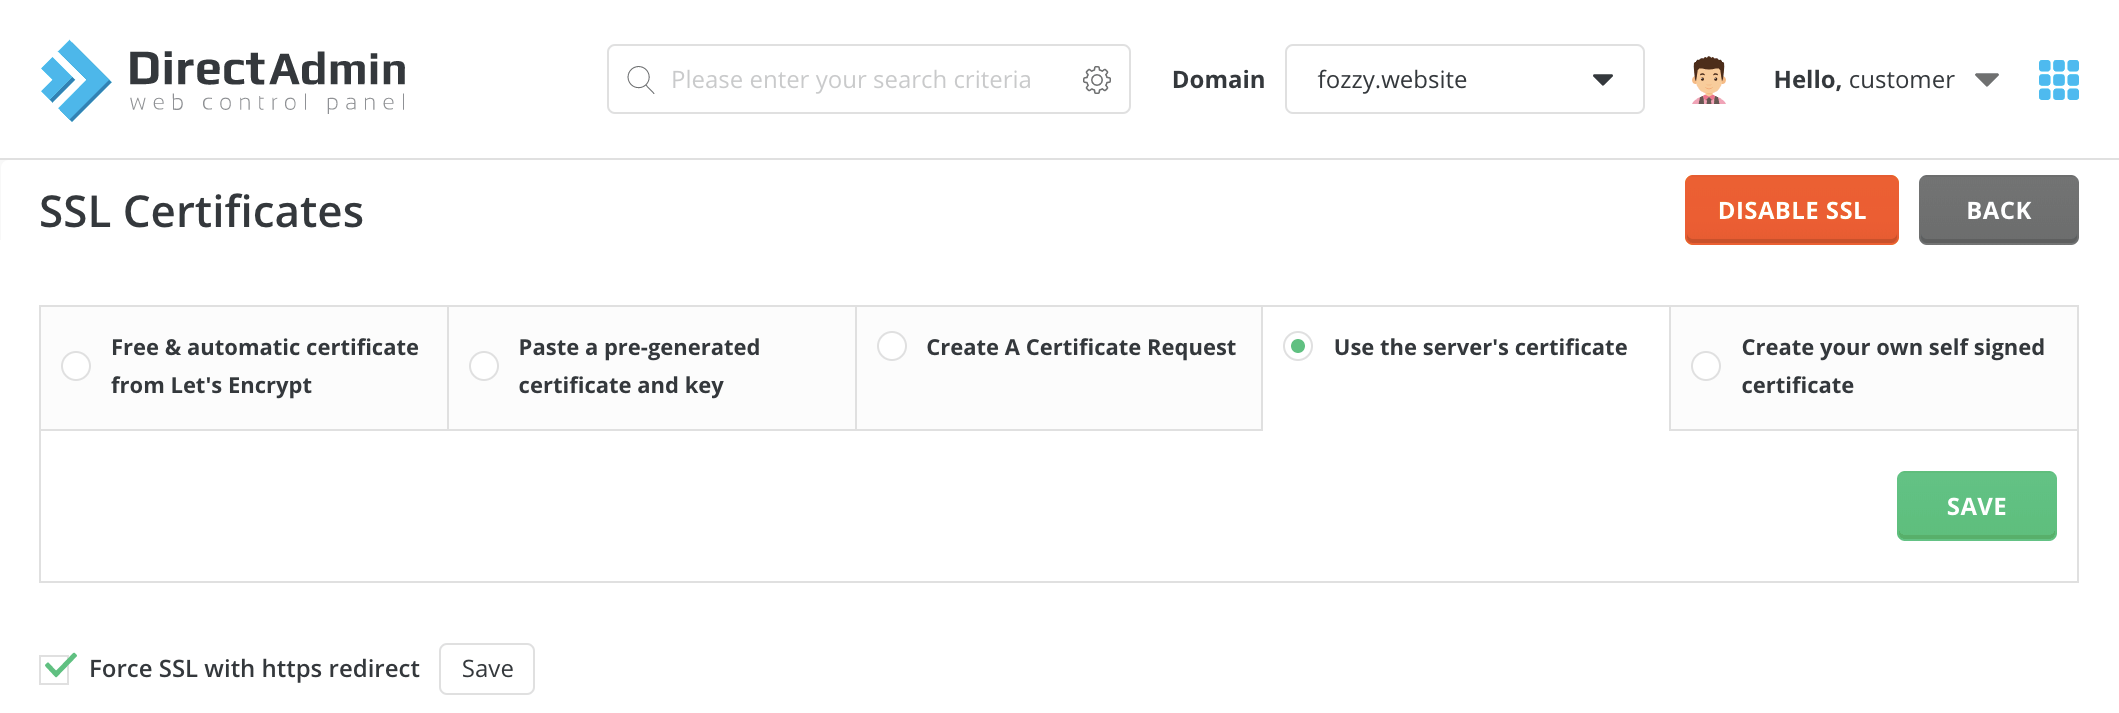
- Use the server’s certificate – One of the simplest ways to have a secure site is to use the server’s built-in self-generated certificate.
- There is nothing to fill or specify in this area. Just click the “Save” button and the certificate will be generated and saved;Warning: Although safe-signed certificates provide a high level of encryption, they are not trusted by browsers. Because of this, your site visitors may receive a warning popup window when they access a secure page. Therefore, we DO NOT recommend using this method:
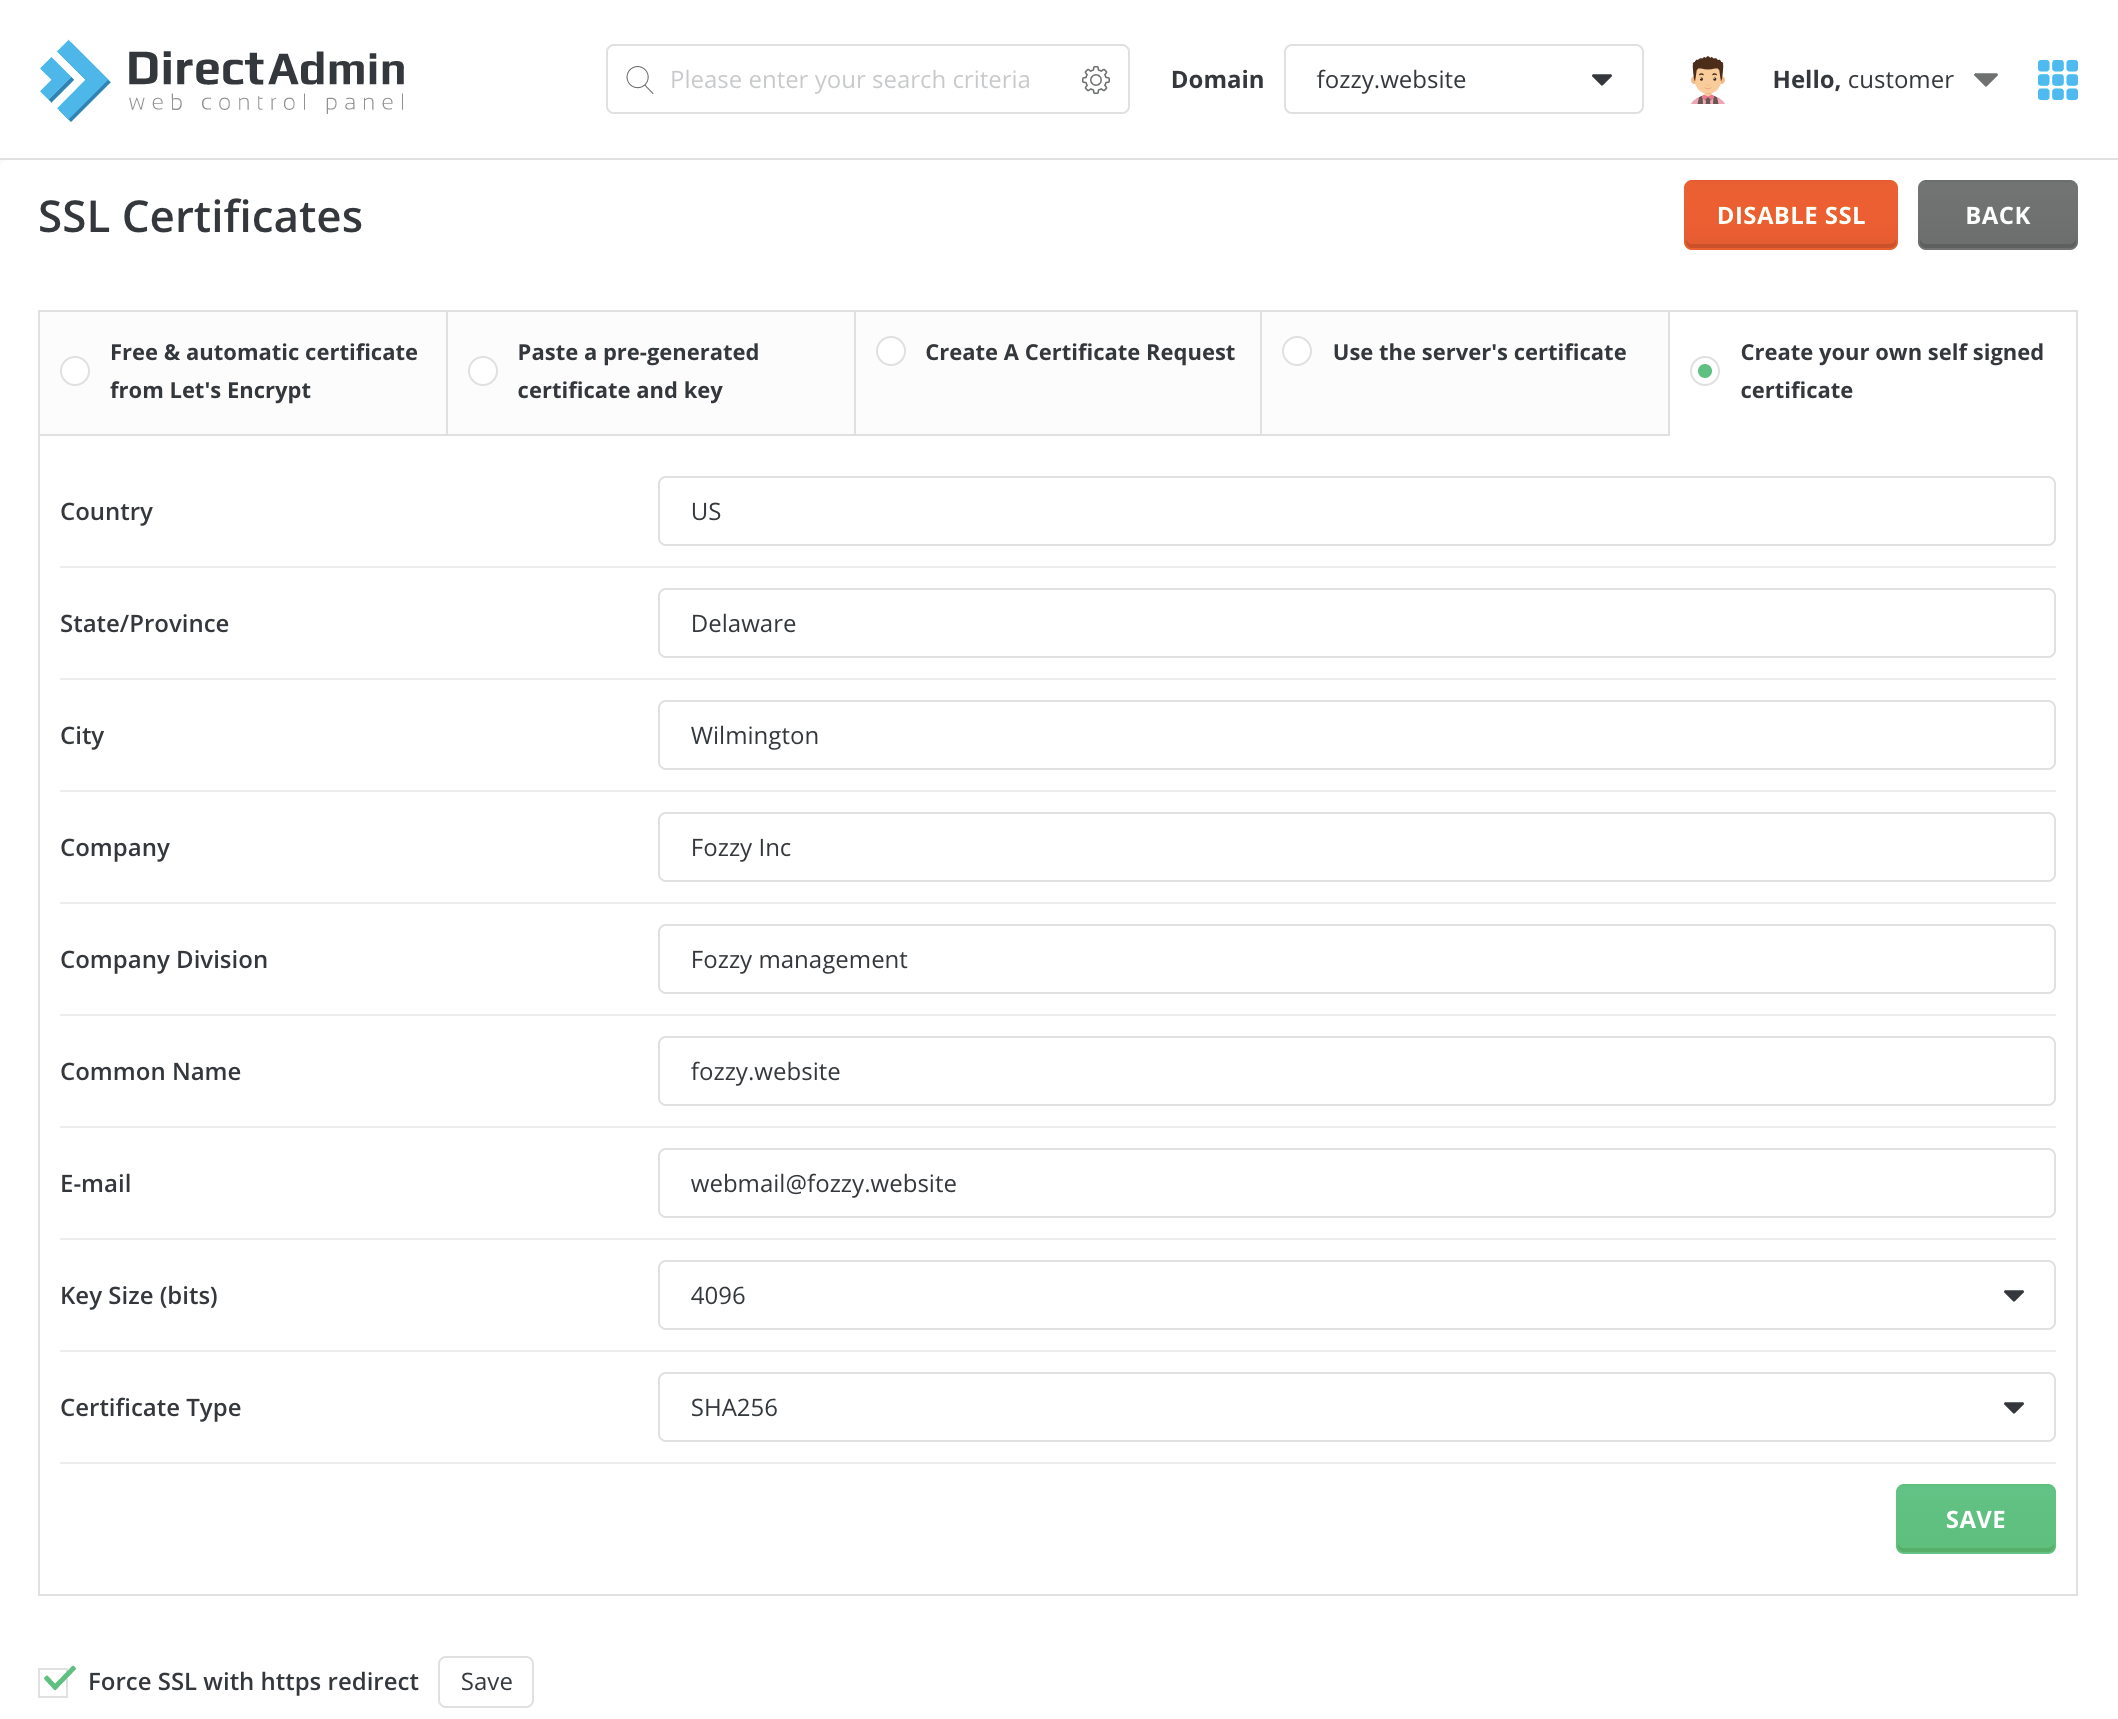
- Create your own self-signed certificate – An alternative to the self-generated shared server certificate is a personalized self-signed certificate. While creating your own self-signed certificate, you have to fill in the following lines with your personal data:
- Country – your country code (e.g. US);
- State/Province – the name of your state or province;
- City – your city name;
- Company – your company name (type “Private Person” if you don’t have one);
- Company Division – your company division (type “Private Person” if you don’t have one);
- Common Name – the name of your domain you want to issue a certificate for;
- E-mail – your email;
- Key Size (bits) – the longer the key size, the strongest the protection;
- Certificate Type – the encryption algorithm. SHA1 is an old and insecure algorithm. It is not trusted by browsers since 2014. Pick SHA256;Once all the information is specified, click the “Save” button. Your self-signed certificate will be generated and saved. It also will be placed in the “Paste a pre-generated certificate and key” section, where you can reach it to copy or manage;Warning: Although safe-signed certificates provide a high level of encryption, they are not trusted by browsers. Because of this, your site visitors may receive a warning popup window when they access a secure page. Therefore, we DO NOT recommend using this method:
- Once you click the green “Save” button, your certificate settings will be applied instantly;
- You can also see the “Force SSL with HTTPS redirect” option at the bottom of this page. Hit this checkbox and click “Save” next to it for your site to be instantly redirected to secure https:// protocol.
cPanel
- Go to your client area to the “Services – My Services” section and click the “Open cPanel” button;
- The cPanel will be opened. Go to the “Security” section and click the “SSL/TLS” button;
- Click the “Manage SSL sites.” button in the section “INSTALL AND MANAGE SSL FOR YOUR SITE (HTTPS)”;
- From the drop-down list, select the domain for which you want to install an SSL certificate and follow the instructions below:
- In the field “Certificate: (CRT)” you need to insert the contents of the file with the .crt extension;
- In the field “Private Key (KEY)” you need to insert the contents of the file with the .key extension (the private key that was provided to you when generating the CSR request);
- In the field “Certificate Authority Bundle: (CABUNDLE)” you need to insert the contents of the file with the .cabundle extension;
- Click the “Install Certificate” button located at the bottom of the panel.
To install a free SSL certificate with auto-renewal, you need to first activate free SSL certificates. To activate it, go to your client area -> Services -> Manage -> SSL-certificate -> AutoSSL -> Install. After clicking “Install”, go to cPanel -> SSL/TLS Status -> Select desired domains -> Run AutoSSL. Certificate will be installed within 1 hour for all domains hosted on the service.
To redirect to HTTPS, you need to add the following lines to the .htaccess file:
RewriteEngine On
RewriteCond %{HTTPS} =off
RewriteRule (.*) https://%{HTTP_HOST}%{REQUEST_URI} [QSA,L]
ISPmanager
- Go to your client area to the “Services – My Services” section and click the “Open ISPmanager” button;
- The ISPmanager panel will be opened. Go to the section “WWW – SSL certificates”;
- To install a free SSL certificate from Let’s Encrypt with automatic renewal, click the “Let’s Encrypt” button, select a domain from the drop-down list and click the “Ok” button;
- To install a paid existing certificate, click the “Add” button and at the first step select the type of SSL certificate – “Existing” and click “Next”;
- In the second step, enter a name for the certificate and then fill in data from the certificate files. Open the certificate files one by one with any text editor and copy:
- Certificate – paste the certificate code found in the file with .crt extension;
- Certificate key – paste the private key of the certificate found in the file with the .key extension (the private key that was provided to you when generating the CSR request);
- Certificate chain – paste the root and intermediate certificates found in the file with .ca-bundle extension;
- Upon completion of filling in the data, click on the “Finish” button;
- To activate the certificate, you need to connect it to the WWW domain. To do this, go to the “WWW domains” section, select the domain and click the “Edit” button. Next, select the added certificate in the “SSL certificate” field;
- You can also see the “Redirect HTTP-requests to HTTPS” option. Hit this checkbox and click “Ok” next to it for your site to be instantly redirected to secure https:// protocol.