How to Deploy an ASP.NET Project with Visual Studio and Web Deploy
What is Web Deploy
Web Deploy is a technology that allows you to deploy ASP.NET and .NET Core applications to our hosting easily. Instead of copying new files via FTP and deleting the old ones manually, with Web Deploy you synchronize your application files automatically—it takes care of all required operations under the hood.
You can use it directly from a developer’s machine or integrate it into your CI/CD pipeline for fully automated deployments:
- https://library.octopus.com/step-templates/ba8581a6-c463-40fb-ab98-3800e761b6f4/actiontemplate-web-deploy-publish-website-(msdeploy)
- https://www.appveyor.com/docs/deployment/web-deploy/
- https://muktak.com/continuous-deployment-of-net-projects-using-jenkins/
Web Deploy is already active on all our ASP.NET hosting offerings—you do not need to enable anything separately.
How to configure Visual Studio to publish applications via Web Deploy
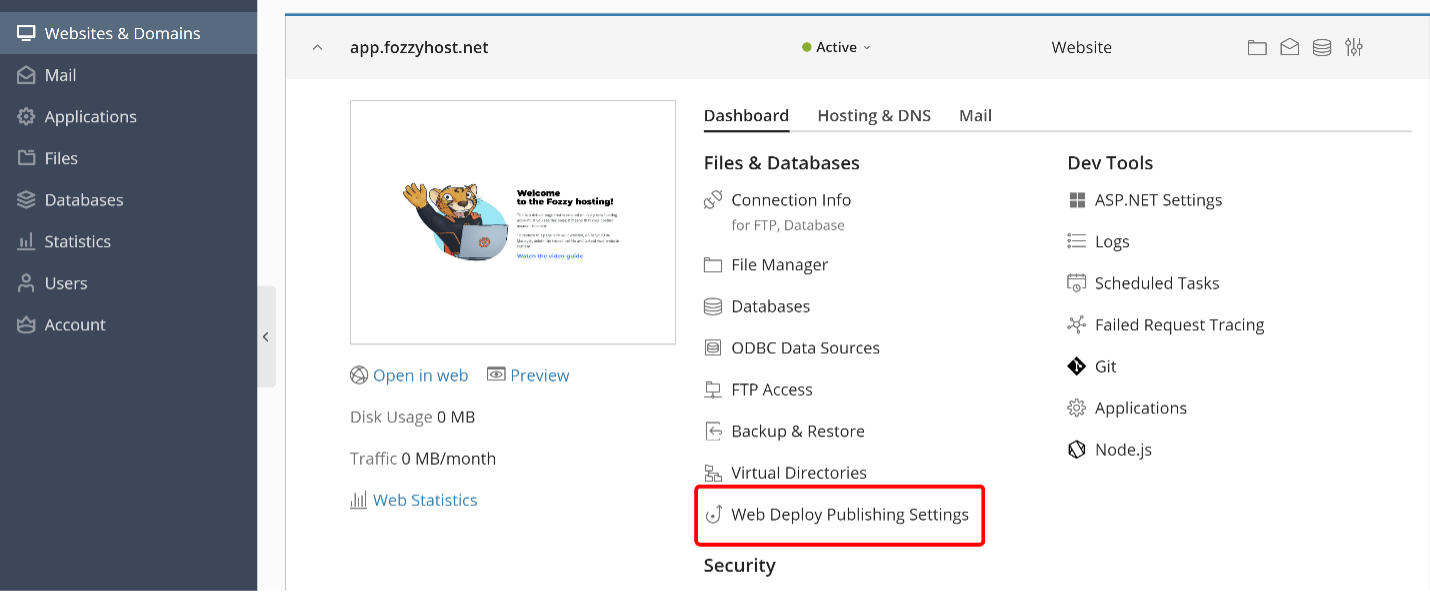
- Open our web control panel—you received a link to it and the credentials in the welcome email.
- In the control panel expand your website’s section: on the Dashboard tab you’ll see a “Web Deploy Publishing Settings” link. Click that link and you get a file in return called “<your-domain-name>.publishsettings”

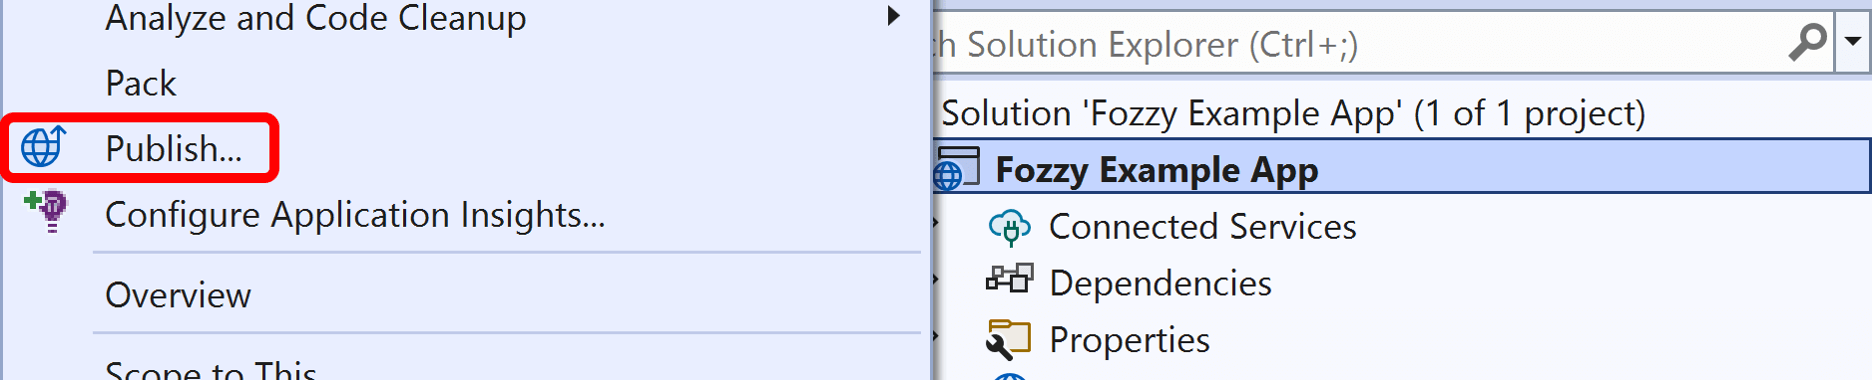
- Open publish settings for your project. For that, open the project in Visual Studio, and in the Solution Explorer open the context menu for your project—select “Publish…” there:

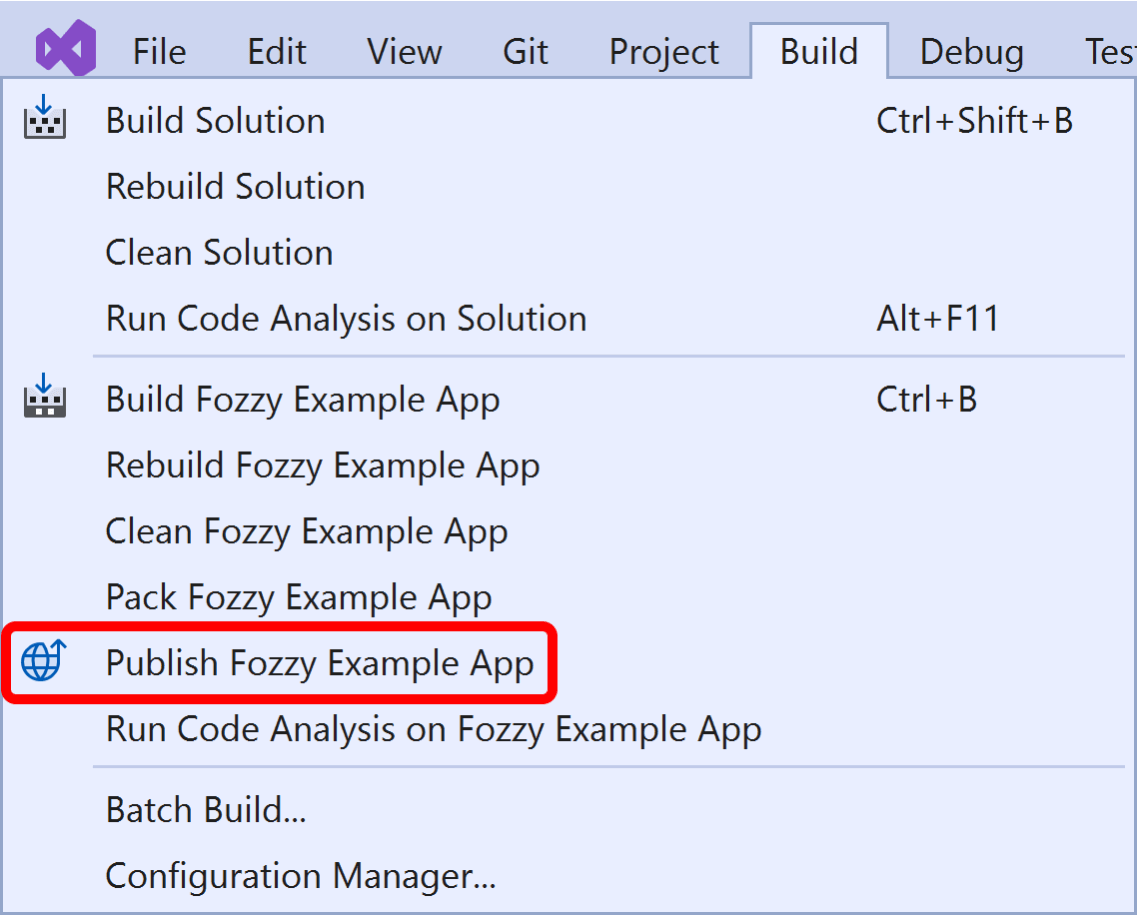
- Alternatively, you may use the “Build” section in the top menu:

- Alternatively, you may use the “Build” section in the top menu:
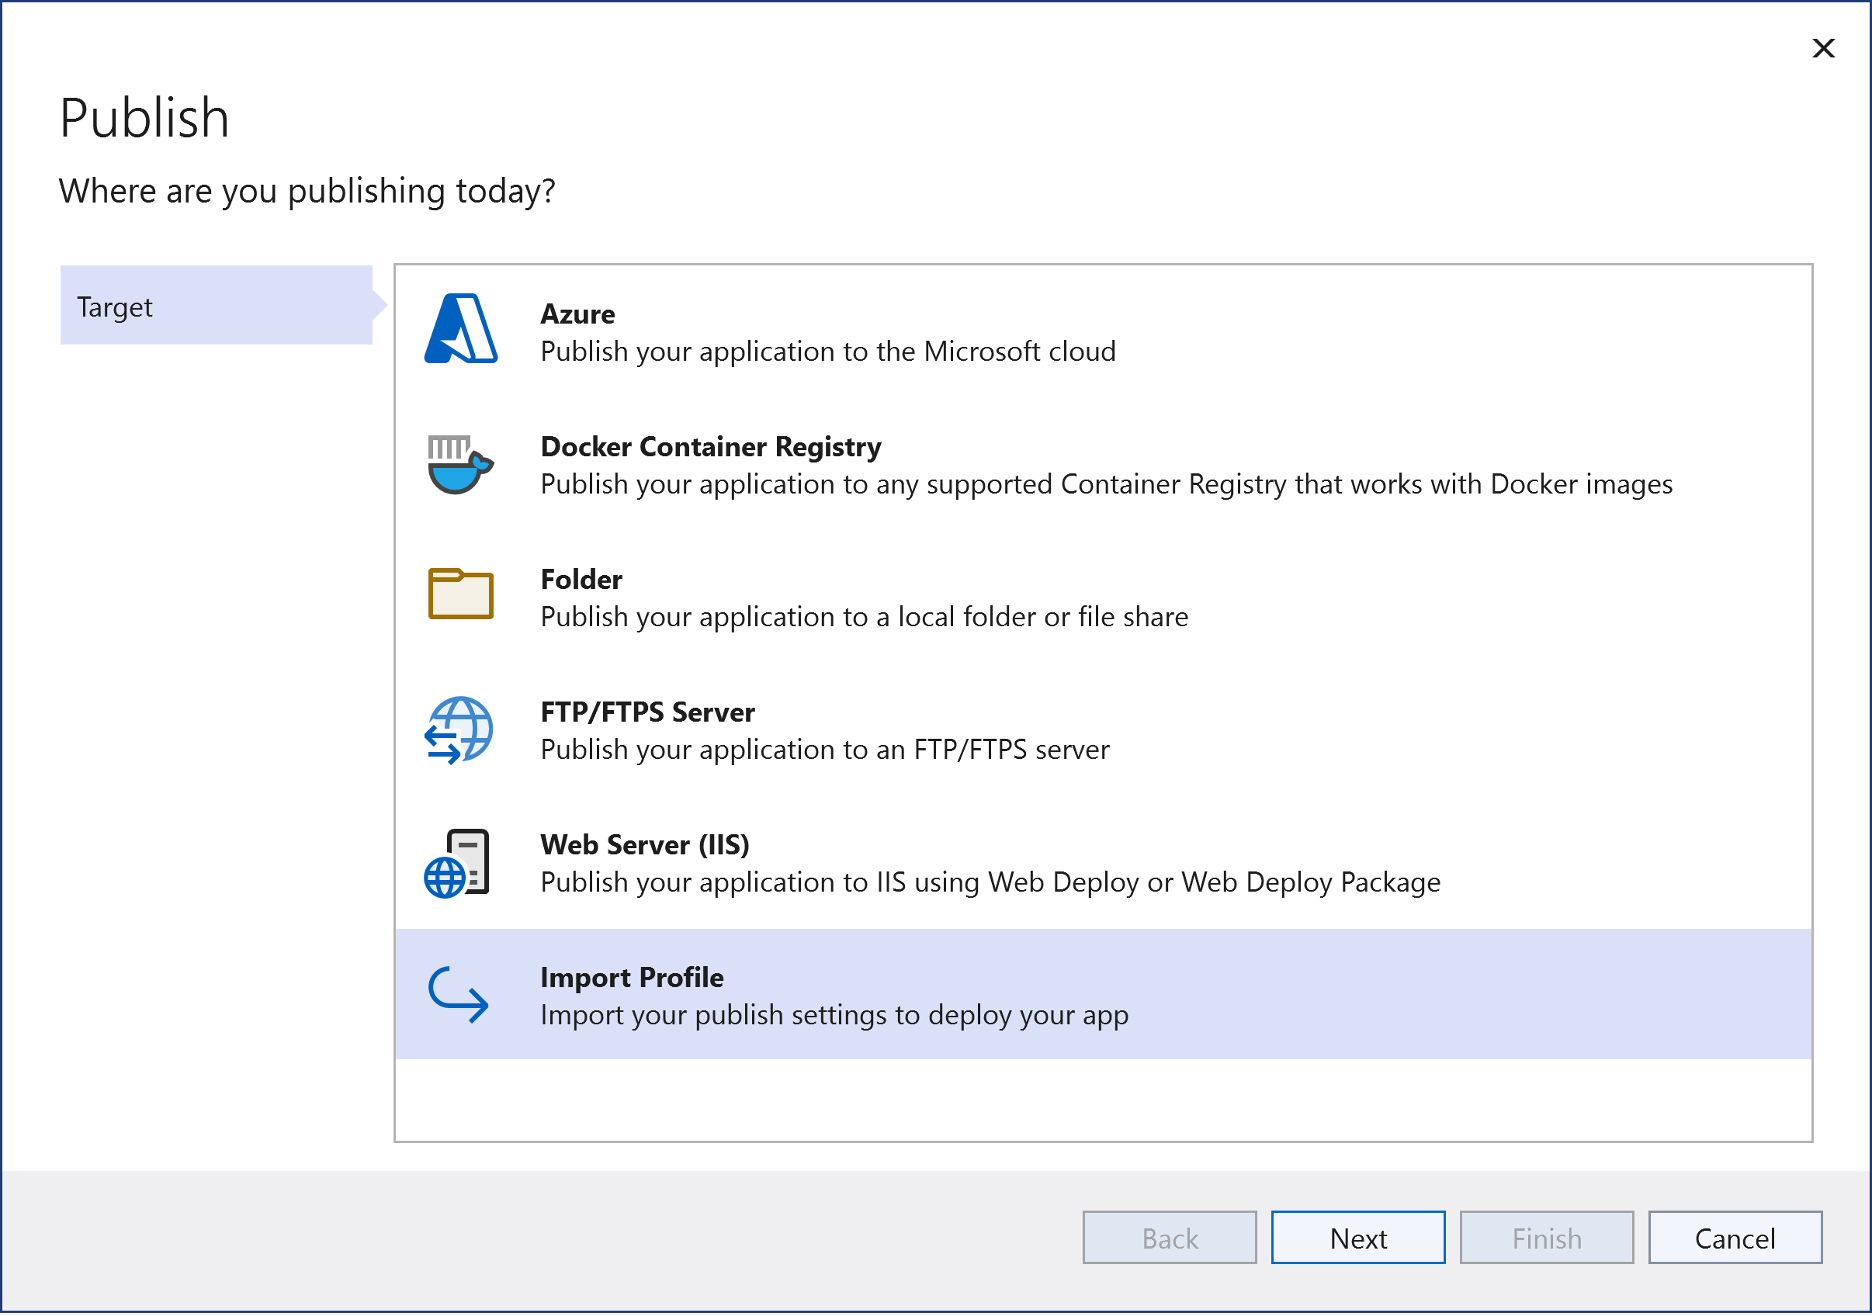
- In the Publish master, select “Import Profile”:

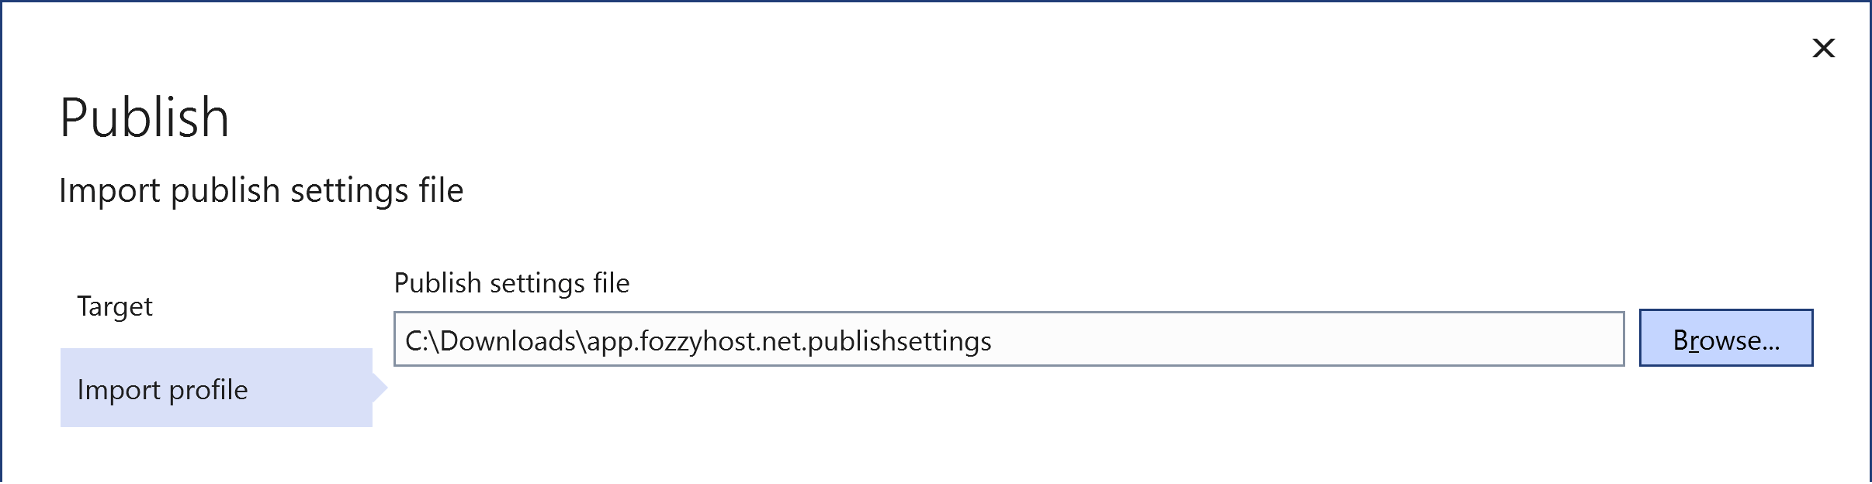
- On the next page, specify the path to the .publishsettings file you downloaded earlier.

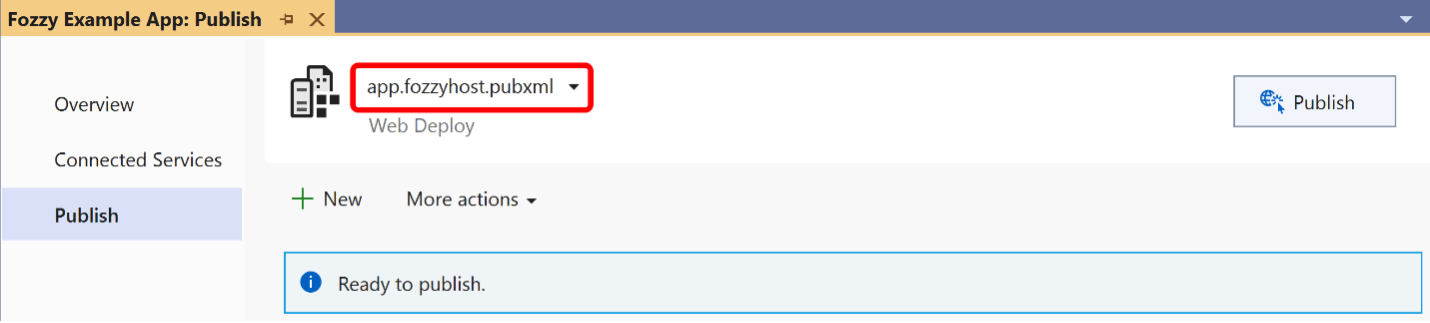
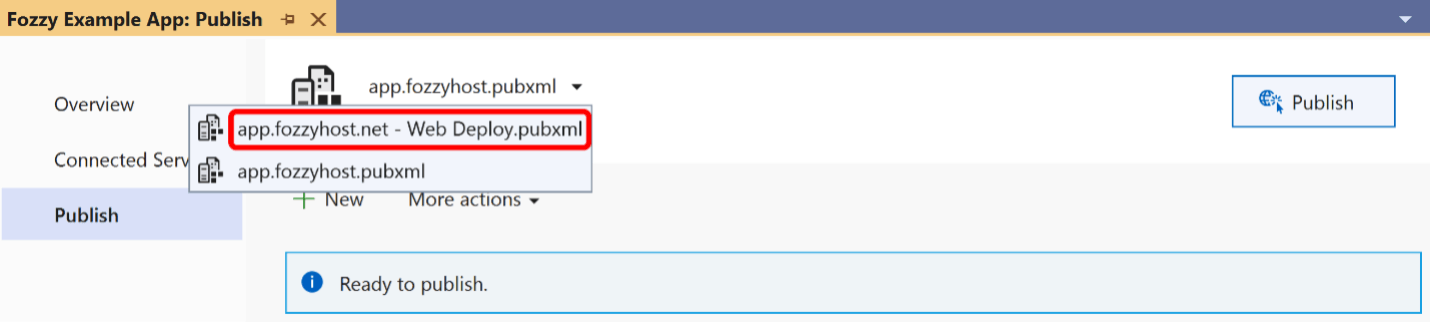
- After that, the master will return you to the app to publish the page. Here, click the name of your publish profile and select the one with the “Web Deploy” suffix.


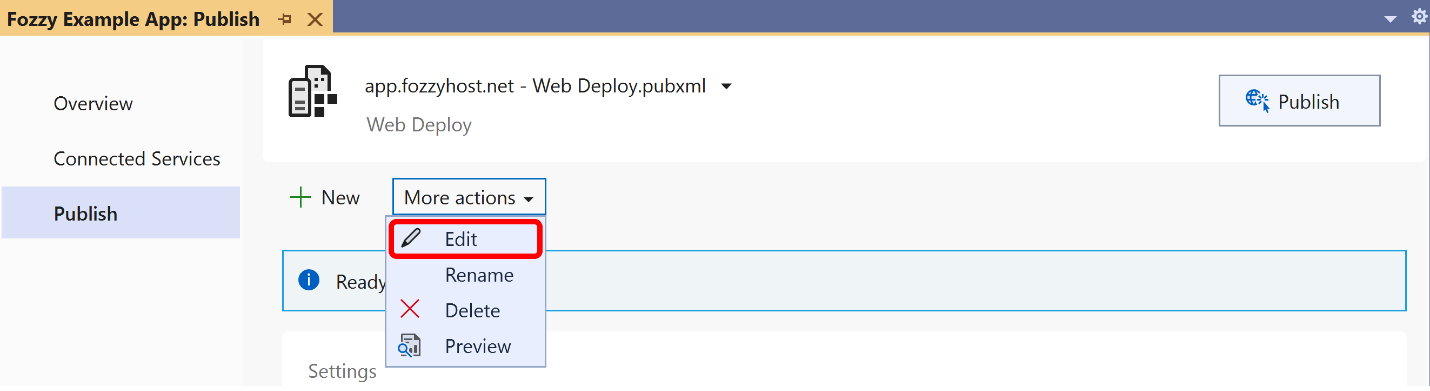
- Click “More actions” and select “Edit”:

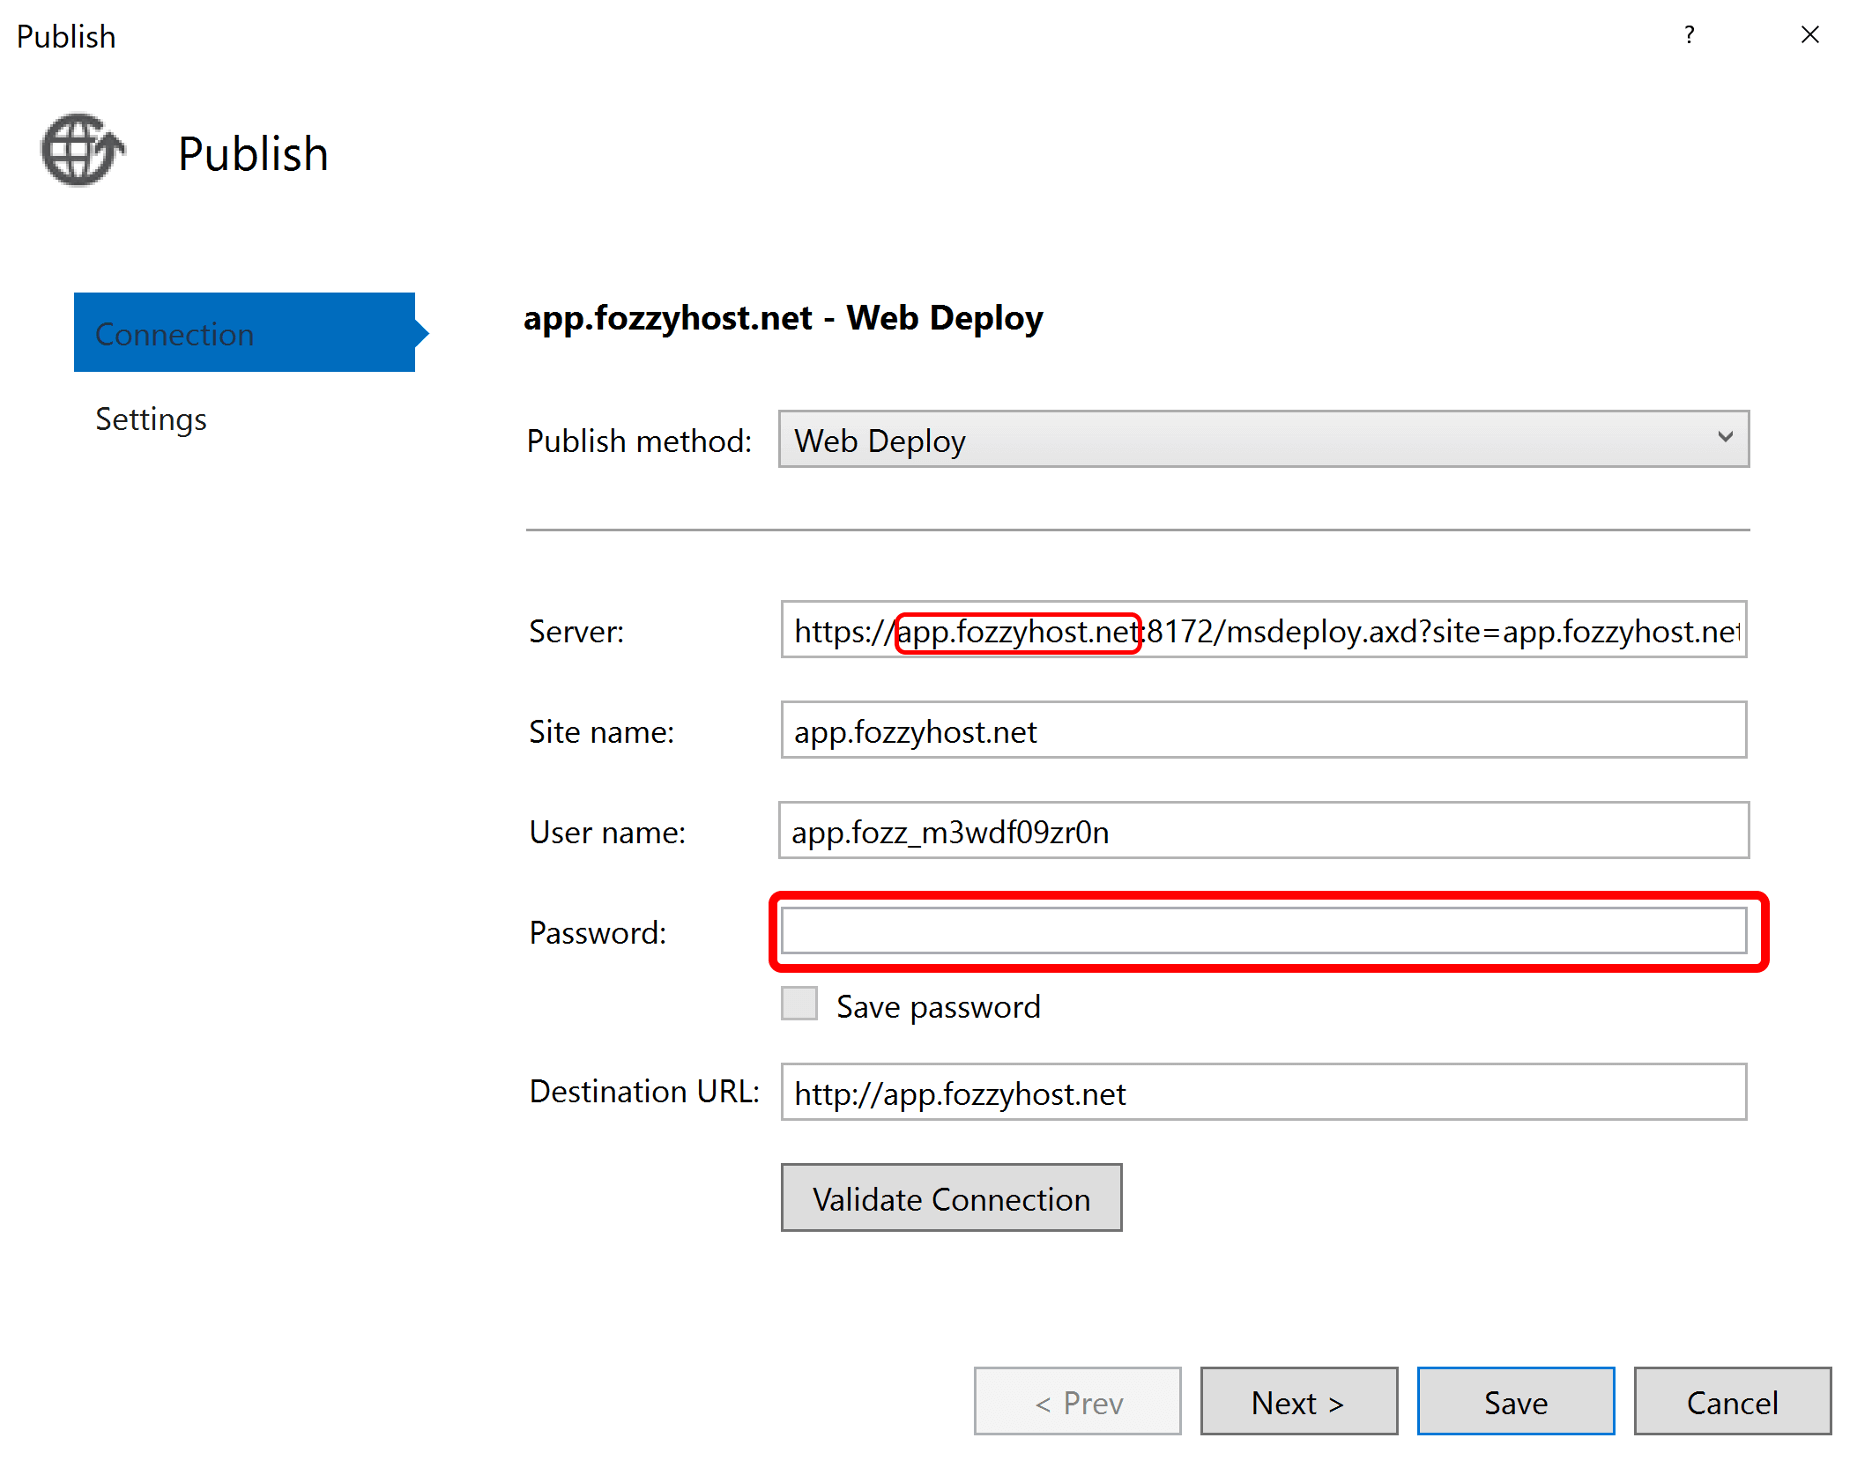
- On the “Connection” tab replace the server name with the domain name of the Plesk web panel, fill in and save your password:

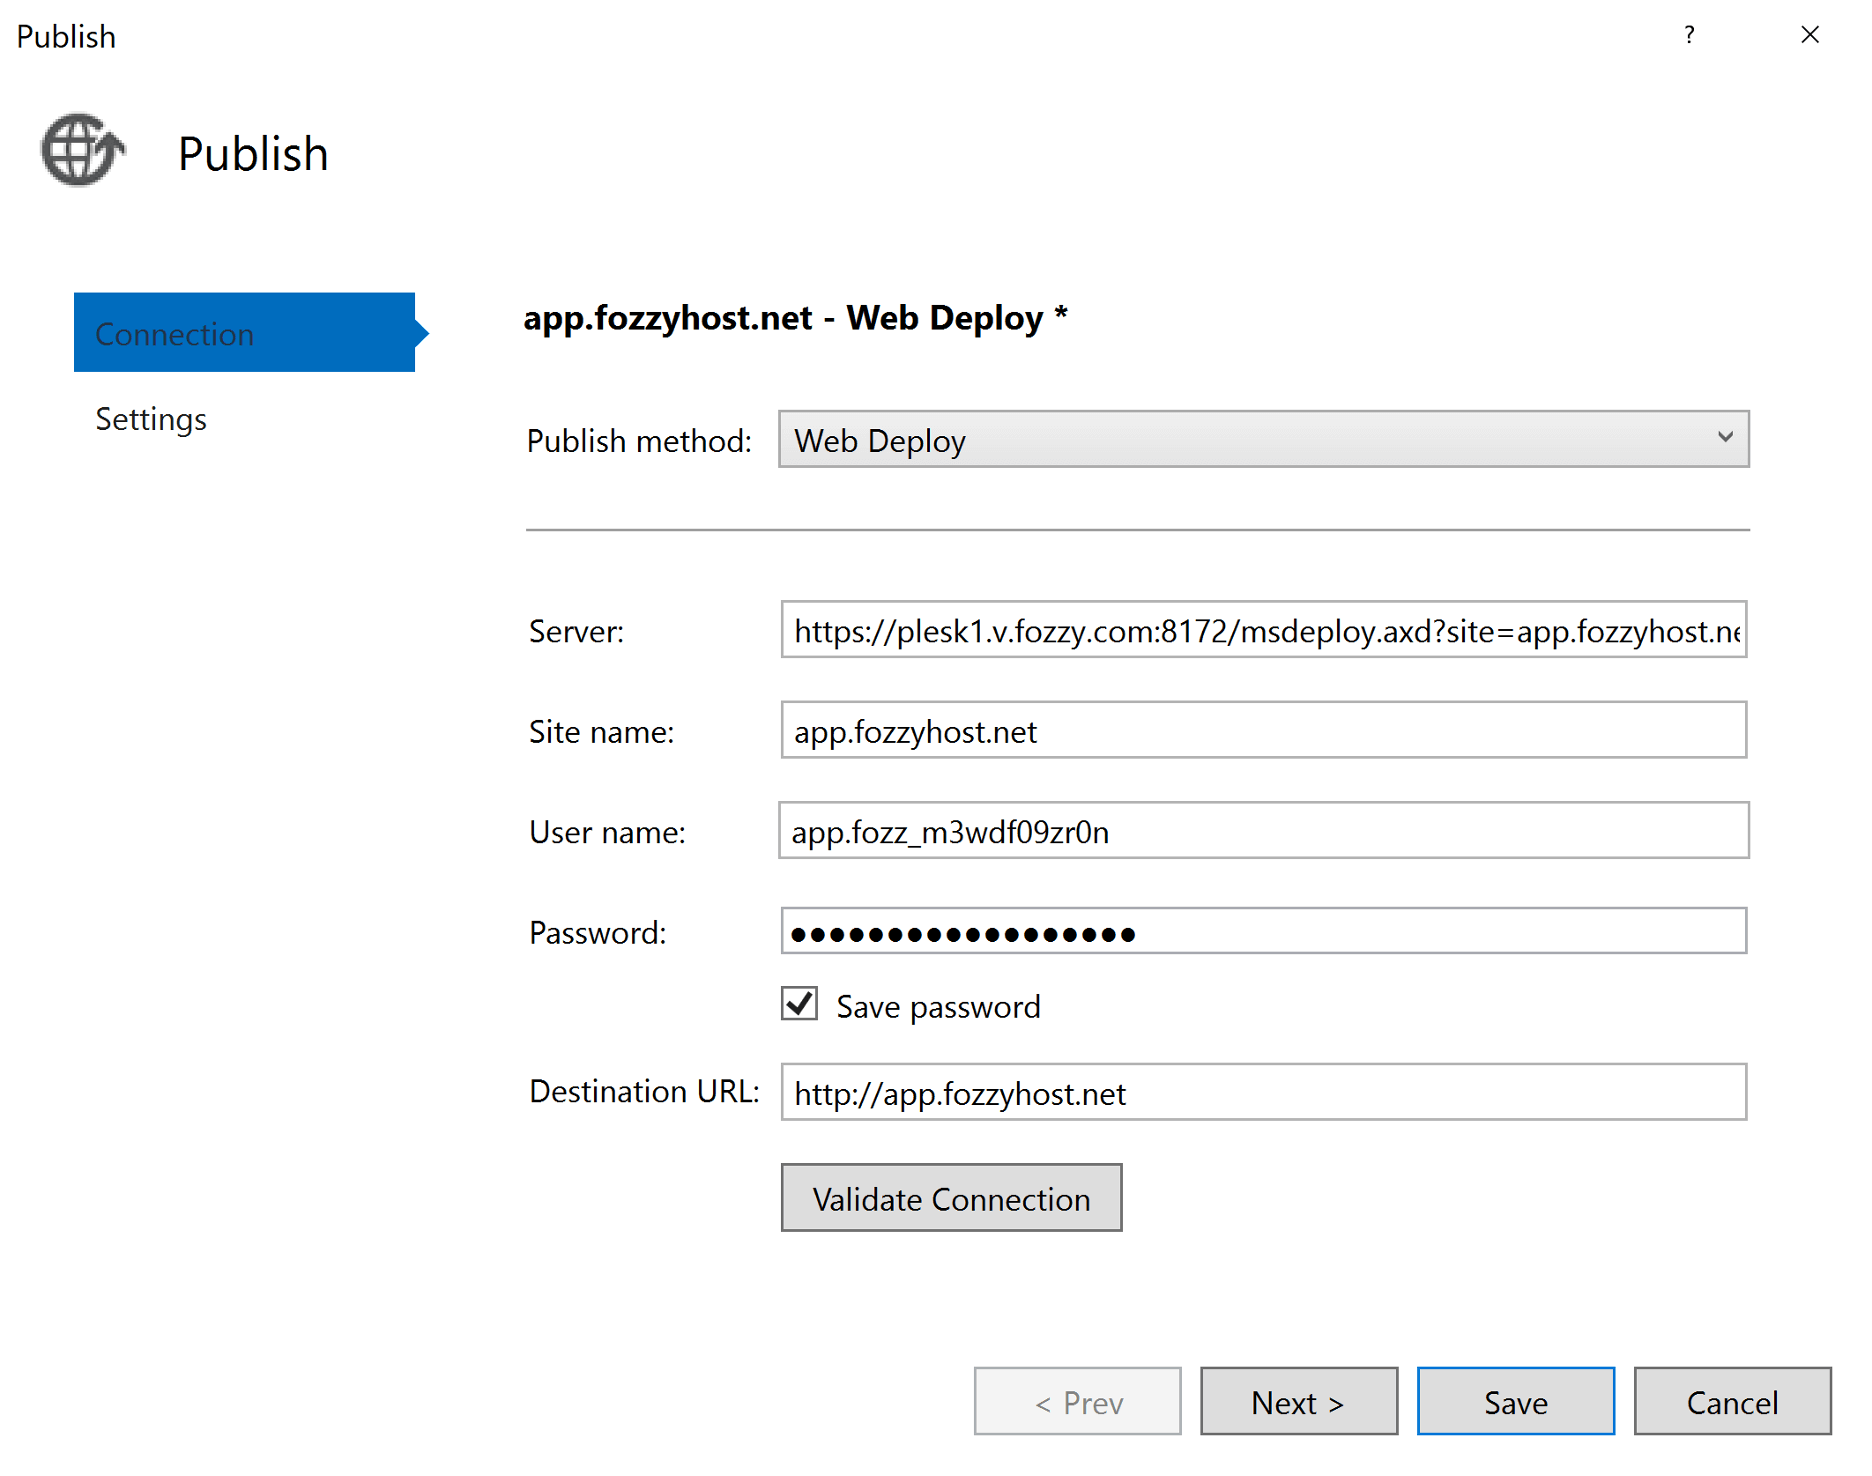
- In the end, your connection settings should look like this:
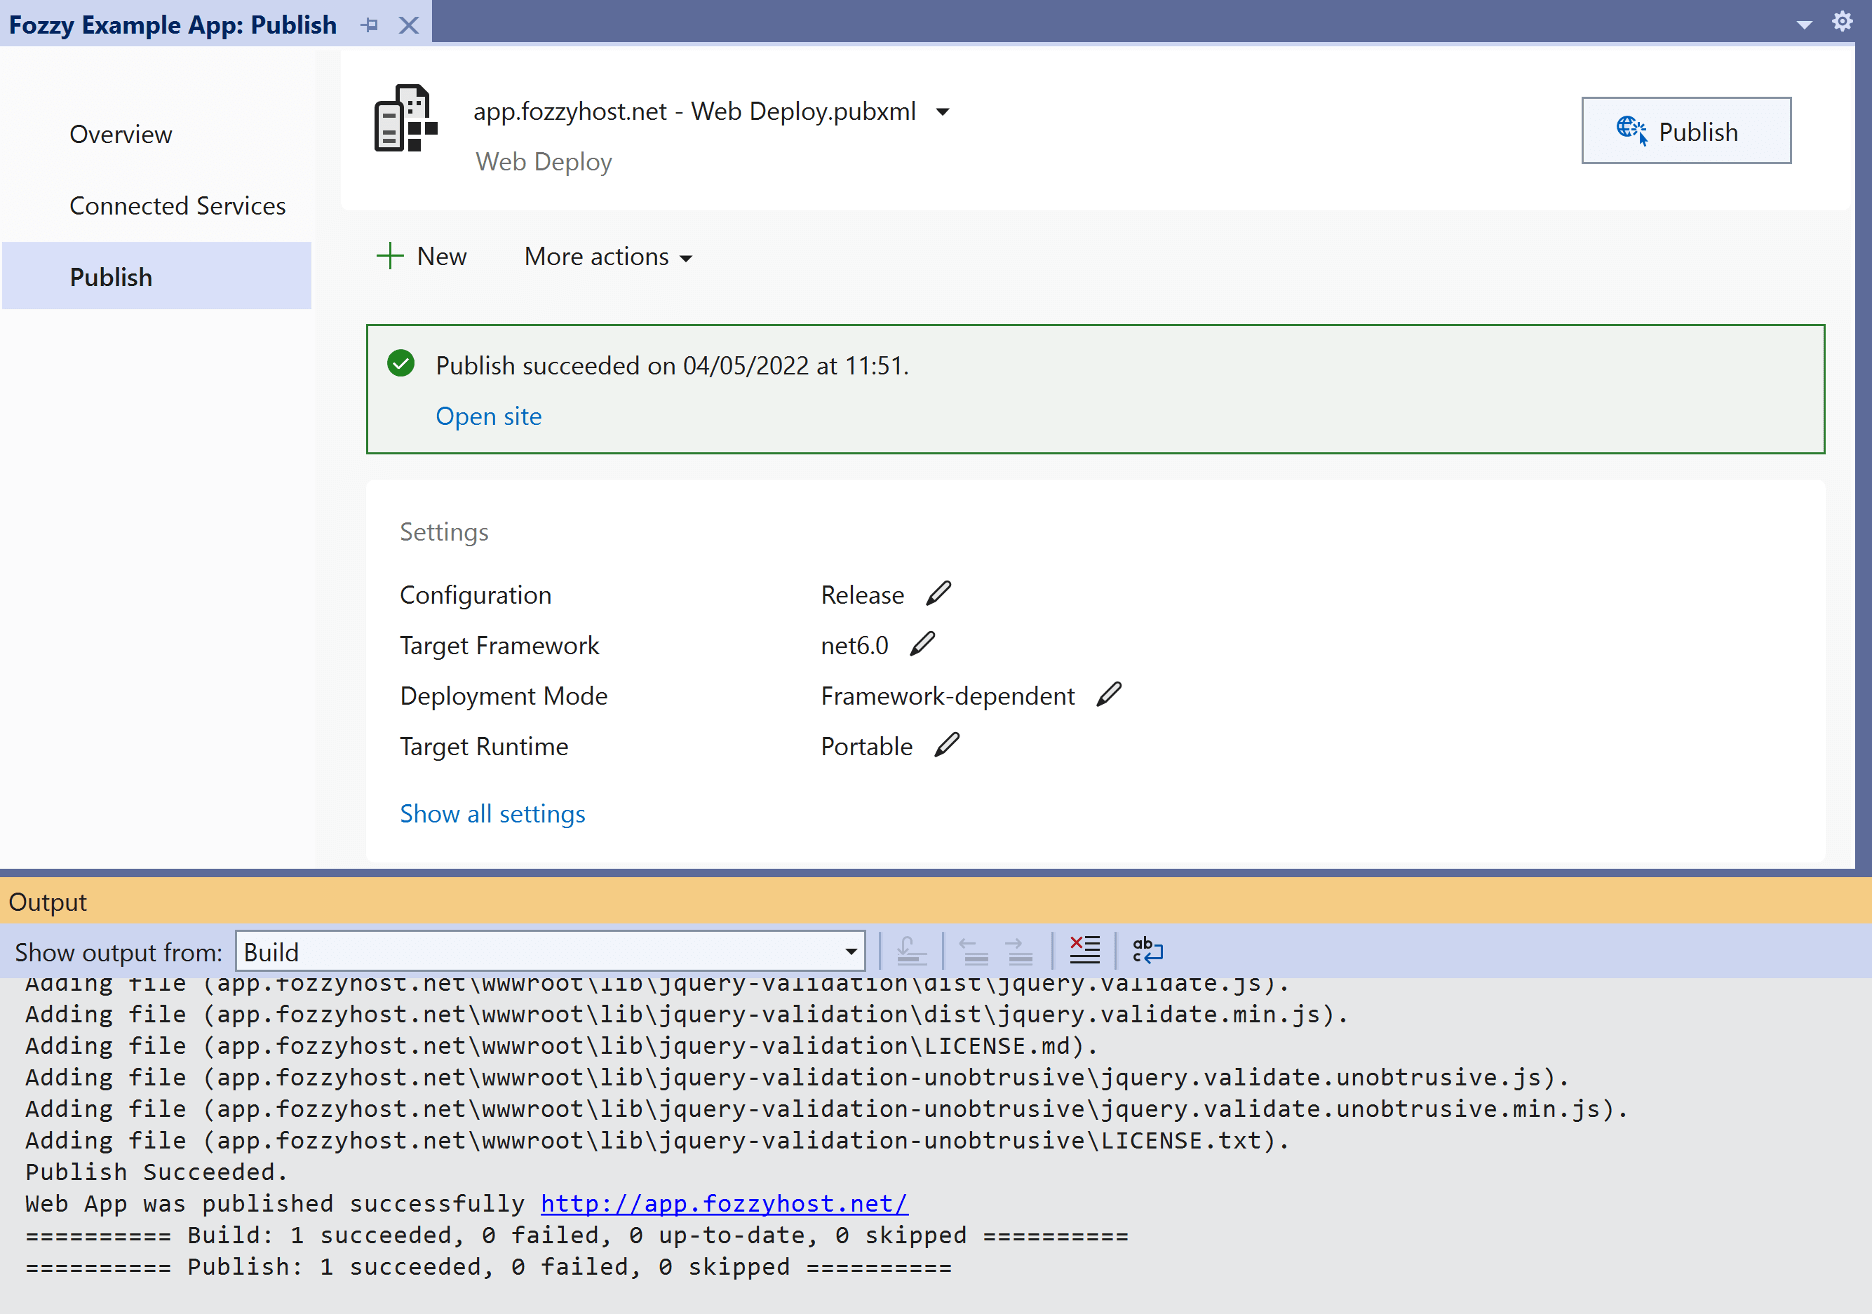
- Now you are ready to publish. Hit the “Publish” button and enjoy!


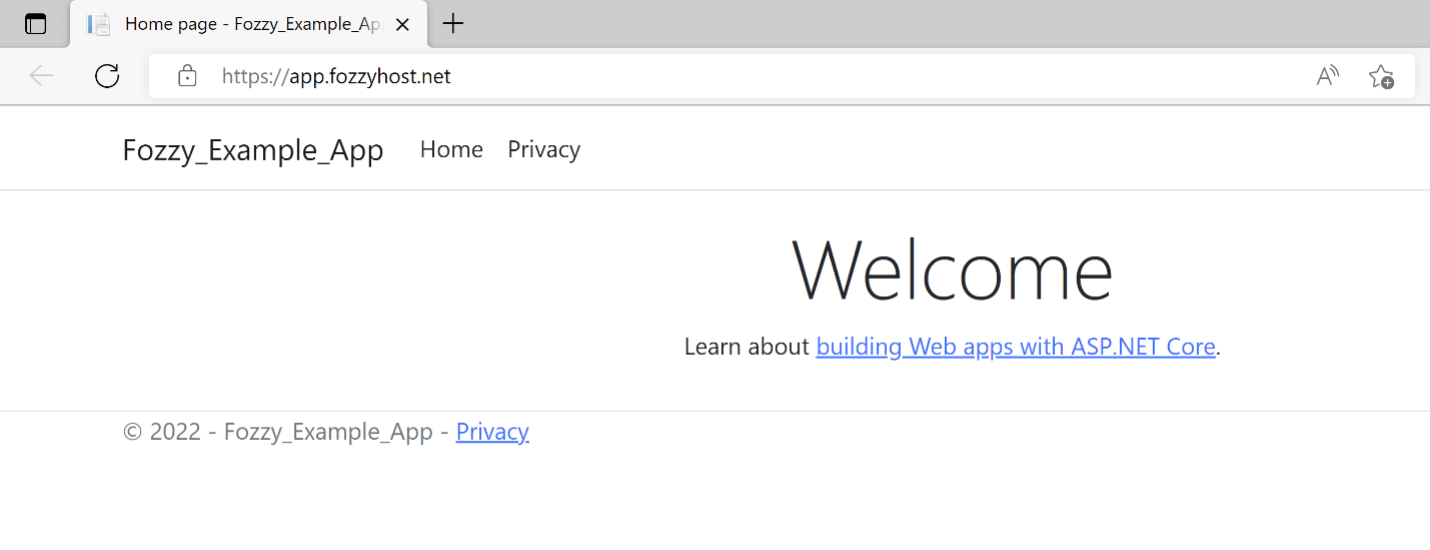
And that’s it: you’ve just published your app on a Fozzy server—check it out in the browser: